


How to Install an Under Mount Sink
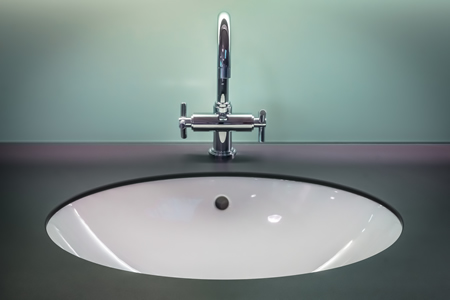
Under mount sinks are currently very popular in both kitchens and bathrooms. They provide a nice, modern look, and they make cleaning the countertops a breeze. Just one time of wiping those crumbs from the countertop directly into the sink without that annoying lip in the way and homeowners are sold. The good news is that for many people this can be a DIY project. It can be a little more difficult if the house has granite countertops as it is recommended that a professional be used to cut the holes in the granite but otherwise it’s pretty straightforward. Before starting this project, always be sure to measure the opening in the countertop and make sure the new sink is the same size.
First turn off the water supply to the sink and disconnect the existing plumbing connections using a wrench and then unscrewing by hand. After that, disconnect any other sink clips with a screwdriver and remove the old sink.
Next prep the area for the new sink. This includes scraping off any leftover caulking from the old sink and making sure the underside of the countertop is clean as well.
Hold the under mount sink in place and have someone else mark the spots on the underside of the countertop where holes will need to be drilled for the clamps. Take the sink out and use a drill to create holes in the marked spots. Next clean the ridge of the new sink with denatured alcohol and allow to dry. Now insert the under counter-mount sink clips into the existing holes in the countertop. Use a screwdriver to loosely screw the machine screws into the brass threaded inserts.
Now it’s time to get the sink in place. Before starting this, get a 2x4 and put it across the countertop over where the sink will go. When the sink is held in place, use a clamp with one end going through the sink’s drain hole and the other end on top of the wood to hold it in place. Apply a thin layer of silicone sealant to the sink’s lip, put it in place under the counter, secure with the clamp. Next insert the wing nuts into the screw heads and hand tighten them. Tighten the screws for the clips and place the clips under the rim of the sink.
After a few days everything will be set and it’s time to install the faucet and connect the water lines. Lastly turn on the water supply to the sink and check for any leaks.
This project is even easier for bathroom sinks. Simply pull the entire countertop out and flip it over. Put it on saw horses and begin the steps for the installation of the sink. Under mount sinks are a great improvement to any home, and it’s an easy weekend project.
If this seems like more than you want to try on your own, or you run into difficulties, contact the professionals at All Star Plumbing and Restoration. We’d be happy to install your under-mount sink.
Are Flushable Wipes Safe to Flush?
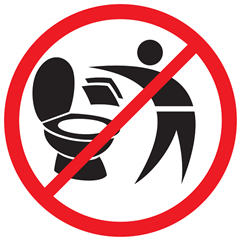
Flushable wipes seem to have come out of nowhere and now they’re everywhere. Initially they were primarily used by moms of toddlers and young children, but in the last few years sales of adult branded wipes have grown tremendously. This means the volume of flushable wipes being sent through the sewer systems has gone up dramatically as well. While initially it was believed that the wipes were safe to flush, in recent years it has been proven that at these increased volumes, wipes are creating major problems.
Many people have heard about big cities such as New York and London banning these products due to the density of population and the already stressed sewer systems, but what about in more rural areas or smaller cities? It turns out they’re still not a great idea. The majority of the wipes labeled as “flushable” take substantially longer to break down than toilet paper, in the meantime other things in the plumbing such as thick toilet paper or pads from toilet cleaning wands, get caught with the wipes and can create major clogs. If this happens, you’ll definitely need to call All Star Plumbing to get it resolved. These wipes also create a problem for septic systems forcing homeowners to get them emptied much more frequently, prematurely replace pumps and force upgrades to the entire septic system. All of these are substantial expenses that seem to outweigh the benefits of flushable wipes.
Why do consumers continue to purchase them? While it’s been reported for several years that flushable wipes are creating problems, sales have continued to increase roughly 6.9% year over year. The main reason seems to be marketing. The manufacturers are labeling the products as “safe for sewer and septic systems”, “breaks down like toilet paper”, and “septic-safe”. While there are a couple of brands that have actually created wipes that meet these claims, the majority do not. Their wipes may break down like toilet paper eventually but it requires a much longer time for that to happen and in the meantime they cause major clogs. New regulations are in process to require manufactures to have prominent labels stating that their wipes are “not intended to be flushed” if they don’t break down in the same time period as toilet paper but this legislation is still in the works for most states.
How can customers know if a wipe is safe to flush? Wipes that are actually safe to go through sewer and septic systems will begin to break down immediately when placed in water. It should be obvious prior to flushing the toilet that the wipe is breaking apart if it’s truly a safe to flush. If it’s too late and there’s already a problem, call All Star Plumbing & Restoration. We can fix any clog big or small.
8 Ways to Reduce Your Water Bill
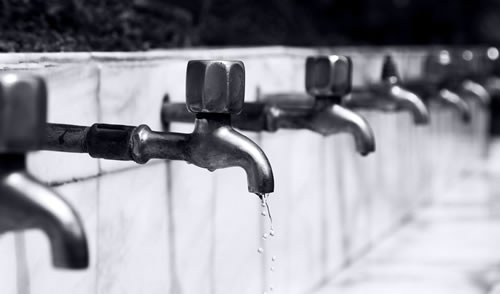
A common New Year’s resolution is to save money and spend less. One way to meet that goal might be to look at ways to reduce your water bill. Often with just a few small changes there can be big results.
- Use Your Dishwasher – a common misconception is that the dishwasher uses a lot of water and should be run as little as possible, but the reality is that running the dishwasher will use less water than it takes to hand-wash the same amount of dishes. So load it up and let it run! Just make sure to fill the dishwasher completely prior to running as it’s going to use the same amount of water whether it’s fully loaded or only half full.
- Fix Leaks – this may seem incredibly obvious but sometimes it’s difficult to tell if there’s a leak, especially if it isn’t making any noise. It’s recommended that homeowners replace the washers in faucets every few years to ensure there aren’t any leaks. The most common areas for a leak are toilets, faucets, and dishwashers so inspect them annually. This can add up to a savings of 20 gallons of water per leak per day.
- Use the Garbage Disposal Less – it may require slightly more effort to put food scraps in the trash can but every time the garbage disposal runs water is being run through it and essentially wasted.
- Control the Flow – consider adding a water flow control valve to the shower. This allows the water volume to be reduced but can easily be adjusted back up if additional pressure is required. Another option is to add an aerator to your faucets. An aerator reduces the amount of water the faucet uses, and adds pressure to the water flow, so it’s a win-win.
- Install low-flow toilets – a low-flow toilet reduces the amount of water used and can save 2-5 gallons of water per flush. A new toilet may seem like a big expense, but when compared to the number of flushes per day in the average household it can add up to pretty quick savings.
- Keep Bottles of Water in the Fridge – most people run the water for a bit before filling their glass to ensure the water is cold, simply having bottles in the fridge already guarantees instantly cold water.
- Load Dirty Dishes – the dishwasher is made to handle dirty dishes so skip the pre-rinse. Scrape excess food from plates and let the dishwasher take it from there, no need to rinse them off first.
- Save on Showers – taking a shorter shower, even trimming just a few minutes off, can save 5-10 gallons of water per shower. In addition, consider showering instead of taking a bath. According to the EPA, the average bath tub takes 35 gallons of water to fill while a five minute shower with a low-flow showerhead would use only 12.5 gallons of water.
Toilet Paper Roll Valentine’s
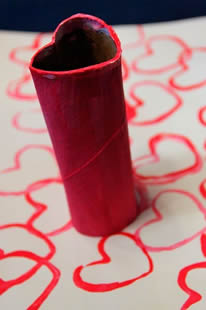 Looking for a fun, cute way to make homemade Valentine’s this year? Reuse those empty toilet paper rolls as heart-shaped stamps to create one-of-a-kind Valentine’s to pass out.
Supplies:
1-3 empty toilet paper rolls
Various colors of paint
Card stock or construction paper
Paper plate
Instructions:
Cut each toilet paper roll in half or in quarters depending on how many stamps you want. Bend in the top of the roll to create a heart shape. Squeeze several paint colors out onto a paper plate. Dip one end of the toilet paper roll in the paint color of your choosing and then stamp onto card stock or construction paper. Repeat with different stamps in different colors until you have the look you’re going for.
Past Plumbing Newsletters