Is Bath Time Fun, Plumbing Safe?

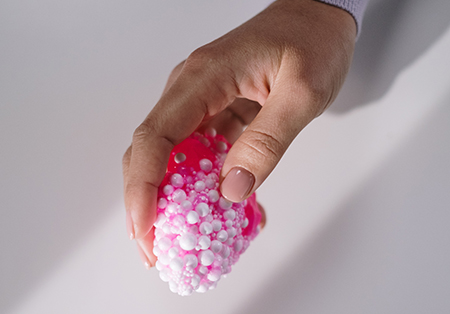
As you shop for the kids on your list this holiday season you may see all kinds of items that can be added to the bathtub, you have to wonder whether these really are safe for your plumbing. We’ve looked at bath slime, bath jelly, bubbles, finger paints, bath crayons, bath bombs, you name it – someone has figured out a way to add it to the bathtub. Here are a few thoughts on some of these products.
The name brand bath slimes and bath jellies have actually been very thoroughly tested, probably to avoid a potential lawsuit from consumers or governments. There’s a tremendous amount of testing required to meet safety regulations for bath and cosmetic products. The reputable companies who make these products have been required to get certifications in the US, Europe and many other countries prior to going to market. If you already have a slow moving drain, likely already partially blocked, then you may find it takes even longer for these products to move through your plumbing. It’s definitely recommended that you get that slow drain addressed prior to using these types of bath items. If you aren’t able to get a plumber out to take a look before the kids dump the slime in, consider disposing of it down the toilet or a different drain.
Bubble bath and bath bombs are a known hazard to your bathtub plumbing. The oils and colorants, as well as glitters, can definitely lead to plumbing clogs. Any highly oily product can coat the inside of your pipes which can restrict water flow. These coatings on the pipes end up attracting other debris and causing a substantial build-up of grime. That can easily entangle hair that travels down the drain. This will catch additional amounts of oils which will congeal together and can lead to a complete blockage. While there may be nothing more relaxing than a hot bubble bath, it’s probably best that this be only an occasional activity and certainly not a daily event.
Other bath items such as finger paints and crayons are used in such a small amount each time that they easily travel down the plumbing of your home without creating any kind of issue. The same can be said for the foaming bath soaps and coloring tablets. All of these are completely safe for your kids to use to enhance their bath time experience. So make these items your stocking stuffers this year rather than the bubble bath.
Fixing a Leaking Garbage Disposal

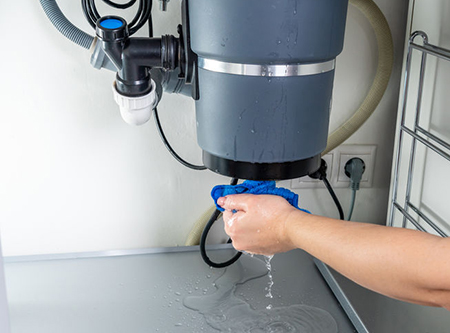
With everyone home pretty much 24/7 these days every part of your house is getting more use, and thus more likely to wear out. That includes your garbage disposal. If you experience that unfortunate event of opening the cabinet under your kitchen sink and finding a pool of water, you’ll need to get it handled quickly. A leak from the garbage disposal can cause a significant amount of water to gather and can cause substantial damage if left unaddressed for too long. Most garbage disposal repairs can be handled without contacting a professional plumber, however if your situation turns out to be especially tricky, call All Star Plumbing and Restoration for assistance.
The most likely culprit in your search for the source of your leak is the gasket located between the flange and the rubber seal. Check this area first as it’s fairly common to find water dripping from here after the garbage disposal has been in use for a few years. To address this, you’ll need to replace the gasket with a new one that you can get from any hardware store. To install the new one, disconnect the drain and pull out the plug from the disposal. If you’re hooked up to a dishwasher disconnect that pipe as well. Rotate the mounting nut clockwise to unlock the disposal which should then expose the rubber gasket. Remove the old gasket and install the new one. Now reinstall the disposal to the sink. Check that the gasket has a tight seal before fully installing the garbage disposal. Once installed hook the drains and dishwasher plumbing back up.
Another potential leak source is the sink flange. If this is your problem begin by removing the screws that attach the main drain pipe to the garbage disposal, then take out the screws on the metal clamp that connects the dishwasher to the garbage disposal, finally remove the free dishwasher hose and tubing. Next take off the mounting ring that holds the garbage disposal under the sink, this should allow you to fully remove the disposal and set it aside.
Now you’ll need to get out your wrench and remove the bolts in the mounting assembly. Move to the top of the sink and lift the flange, you’ll need to remove the existing putty and clean this area. Use new putty and shape it into a ring that fits the outside edge of the flange. Press the putty around the flange and then replace the flange on the sink drain. Now you’re ready to reassemble everything. Start by putting the mounting ring and assembly back in place and finish by reinstalling the dishwasher hose, drainpipe and actual disposal unit.
If neither of those is the issue check some of the more basic things such as a leak from the drain line or the connection point between the dishwasher and the disposal. You may find that someone bumped one of the pipes when storing something under the sink and it’s simply been knocked loose. If the garbage disposal has reached the end of its life you may see a crack or split on the actual body of the garbage disposal. In this case you’ll need to replace it.
If at any point this job becomes too much to handle reach out for help. A professional plumber can take care of this type of leak in minimal time and at minimal expense to the homeowner. Here’s hoping your holiday season doesn’t require anyone to crawl under the kitchen sink!
DIY Tub Refinishing

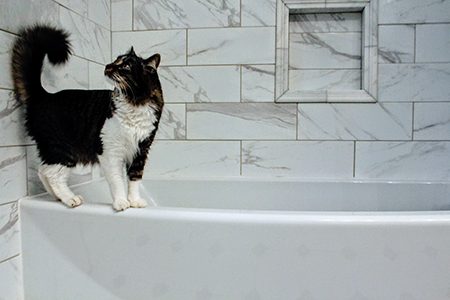
One question many customers ask, especially those with older homes, is whether those DIY tub refinishing products really work. We did a little digging and here’s what we found. There are some situations where using the DIY products is a good choice, but there are many where it probably isn’t a good idea. The first thing you need to do is take an honest look at the condition of your bathtub. If the bathtub is leaking, covered in mold or seriously cracking you’re likely to get disappointing results from trying to reglaze it. This can be true whether you try it yourself or hire a professional. There are simply certain situations that require the purchase and installation of a new tub. If you find yourself in one of those scenarios, it’s highly recommended that you contact a professional plumber to assist with the removal of the old tub and the plumbing and installation process for the new one. It’s actually more complicated than it looks to replace an old bathtub.
If your tub meets the requirements for reglazing there are many products available for those who are comfortable trying it themselves. If you decide to do it yourself spend the money on a quality product. You’re already saving a bundle by providing the labor but it’s not worth it to cheap out on the supplies. If you research a bit on Amazon you’ll find several products with 4.5 stars or more, those are the ones to go with. Ekopel 2K and ArmoGlaze are both good choices. These products both dry within 24 hours, limiting downtime for your showering needs, and are chip-resistant/anti-peel. Both of these products are fairly straightforward to work with and will adhere to a variety of surfaces. Neither has a strong chemical smell and are considered eco-friendly.
While these products come with the highest reviews and the best chance for long-term happiness neither is actually shown to last as long as a professional reglazing. They are likely to last several years but if you’re looking for something to last a decade you’ll probably need to just hire a company that specializes in refinishing bathtubs. The good news is that if you’re looking to remove surface imperfections, such as stains or shallow cracks, you will be incredibly satisfied with the results these companies can give you. And while more expensive than DIY, it’s less expensive than a complete replacement.
If you’re unsure what category you fall in give All Star Plumbing and Restoration a call. We can help you determine whether the tub is still in good working order or really should be replaced. If replacement is required, we can get you an accurate estimate of the cost associated with doing so.
Homemade Marble Ramps

Looking for a great, low-cost, STEM based activity for your little ones? The world of homemade ramps is a fantastic way to unlock their creativity and get them seeing their toys in a whole new way. One quick trip to the hardware store, combined with household items, and your child will spend hours building and rebuilding routes for their marbles to travel.
Supplies:
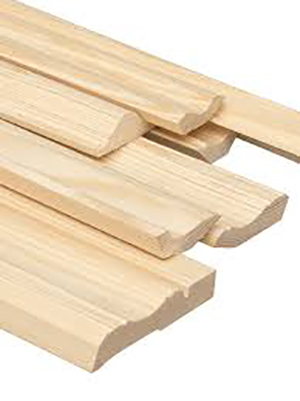
Wood trim (curved in-ward)
Bag of marbles
Saw
Sandpaper
Optional Supplies:
Scrap wood blocks various sizes
Pool noodle
Paper towel roll or toilet paper roll
Painters tape
To create your ramps cut the wood trim down into 12-15 pieces of various lengths ranging from 6” to 3’. Sand the ends to make them safe and easy for kids to handle. If using pool noodles cut them in half the length of the noodle, then cut each half into various lengths. For a fun twist kids can use painter’s tape to secure toilet paper roll or paper towel rolls to the wall at different heights creating a path for the marble to travel down the wall before landing on the wooden ramps. These simple home items provide great tools for your child to learn and problem solve all while having a blast coming up with their unique ramp.
Past Plumbing Newsletters


